Saturday, February 18, 2017

Flowers of Love


Hello Scrapping Cottage friends! Thanks for taking the time to stop and visit today. It's Mary Marsh here bringing you the Saturday edition of the Blog.

We have some fabulous new Spring dies released over at the online store. Today for your viewing pleasure I am featuring Wildflowers 1, Wildflowers 2 and Wildflowers 3 dies. So let's get started on how I created my card.

Navy Blue Card Base: 5 1/2" x 4 1/4"
Patterned Paper Panel: 5 3/8" x 4 1/8"
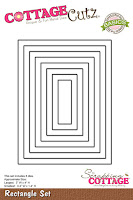
Navy Blue Rectangle Panel: 2 3/4" x 3 3/4" (2nd largest of rectangle dies)

My choice of colors for my card today came from the Splitcoaststampers color challenge #622. Those colors are mint, watermelon and navy blue. And then I chose my background navy patterned paper. From there I decided on a card layout and cut the necessary pieces.

The circles are from the CottageCutz circle and stitched circle dies. Both are the 4th largest dies in the sets. The navy blue rectangle is from the 2nd largest rectangle die in this set.
I cut the wildflowers in the watermelon shade of the color challenge. And the dragonfly in the mint shade also from the challenge. When I started the assembling of my card, I decided to use the Wildflowers 3 die and eliminate the 2 die cuts from Wildflowers 1.
I decided to add a mint strip across my card and top that with some navy blue ribbon. I also stamped my sentiment on the white circle in navy ink. I used an embossing folder to add some texture to the mint panel.
I was now ready to start the assembly of my card. On the large panels I used double sided tape. On the wildflowers I used Ranger multi-matte medium. The wildflower dies have great detail as you can see in this close up photo. On the sentiment circle I also added some watermelon circles.
 
Well that's it for me for this week. I hope I have given you an additional idea on how to use the Wildflower dies. I will be posting again on Wednesday with another idea for using the Wildflowers.  So until then..........
 
 
http://www.scrappingcottage.com/cottagecutzwildflowers1.aspx
 
http://www.scrappingcottage.com/cottagecutzwildflowers2.aspx
 
http://www.scrappingcottage.com/cottagecutzwildflowers3.aspx
 
http://www.scrappingcottage.com/cottagecutzrectanglesetbasics.aspx

http://www.scrappingcottage.com/cottagecutzcirclesetbasics.aspx

http://www.scrappingcottage.com/cottagecutzstitchedcirclesetbasics.aspx


Friday, February 17, 2017

MINI ACCORDION PHOTO BOOK

Hello Dear Friends !!!

It's Anita here and I hope you had a great week. Spring is in the air and birds and bees are to be seen in the gardens.
CottageCutz has something new for you this season and that is the combination of stamps and dies that will surely make you happy. These are super cute and so much fun to colour.
You can check all of them here.
Valentine's Day just got over but a gift for our loved ones is what we all love making.
So here I have a cute mini accordion photo book featuring the CottageCutz Sweet Valentines stamp and Die set.


To make this book, follow the pictures and instructions below.
  

Stamp the image with black ink

Colour with medium of your choice. I have used Zig Brush Pens


Cut them out with coordinating dies


Cut two card stock 12" x 5" and score in mountain and valley fold at 4".


Adhere the last panel of one card stock to the first panel of the other card stock to form an accordion book.


Cut out pattern paper 4.75" x 3.75" and round of corners. Distress with aged mahogany distress ink.

Adhere these panels to the front and back of the book. Adhere Wide Stitched Rectangle frames after they also have been distressed.

Add the die cut images popping them up with 3D foam tape


Tie the book with a ribbon.


CottageCutz dies


Its so much fun to create cute projects using this stamp and die combination. To see many new dies , visit the store here.
Thank you so much for your time and comments. Happy crafting.

Tuesday, February 14, 2017

Spring fairy

Hi, Janja here!

Today I share with you another spring card.


CottageCutz dies: Spring Fairy, Wildflowers 1, Wildflowers 3, Wildflowers 4, Build An Easter Egg

Supplies:
- white card base: 5.3 x 5.3" (13,5 x 13,5 cm), folded
- purple paper: 4.4 x 4.4" (11,2 x 11,2 cm)
- white cardstock: 5.1 x 5.1" (13 x 13 cm)
- fun foam
- white cardstock

Trim purple paper and prepare cutouts with dies from white cardstock.


Fasten all cutouts. Use glue and self-adhesive foam pads.
 

Cut two squares with a paper cutter. One from a white cardstock and another from fun foam. Cut out a square 0.6" (1,5 cm) from the outer edge to get the frame. Interior dimensions are 3.9 x 3.9" (10 x 10 cm).
From purple paper cut out a thinner frame with external dimensions of 4.6 x 4.6" (11,7 x 11,7 cm).
Beautiful bow is cut out by the die - Build an Easter Egg. 


Glue frames to each other and attach a bow in the upper left corner.

Complete the card.


Thank you for coming over and see you next Tuesday.


Monday, February 13, 2017

Shaker Money Holder

Hi, Lois here with a fun project.  I'm sure we all look for creative ways to give money as a gift.  Last fall during the Splitcoaststampers Falliday Fest, one of the tutorials presented was a shaker money holder.  At the time, I didn't have a Fuse tool; so I used sticky tape.  I received a Fuse tool for Christmas, so I'm trying it again -- this time using one of the new CottageCutz stamp/die sets featuring Ben and Chloe.


Supplies used on this project are:

Plastic page protector
Sequins (black, gold, white)
Ribbon
We R Memory Keepers Fuse Tool  (if you don't have one, sticky tape will work)
CottageCutz dies - Bumblebee Chloe, Sweet Valentines
White and Yellow cardstock
Scor-tape and foam adhesive circles
Copic markers
Wink of Stella
Xyron sticker maker

To begin my project, I cut one corner of the 8 1/2" x 11" page protector down to 6" x 7 1/2".


If you've never used a Fuse tool before, you should probably practice a little bit before attempting a project.  You need to let it warm up for about 10 minutes to achieve the proper temperature.   The tool comes with a 6 1/2" ruler/guide, but I needed to fuse the 7 1/2" side; so I used a longer metal ruler.


This made a pocket, which I folded in half, using a bone folder to make a good crease.


I opened the pocket and poured in some black, gold, and white sequins -- distributing them evenly on both sides of the crease.


Then I folded the pocket back together and fused along both short sides.


It just so happened that I had some ribbon with bumblebees on it.  I cut a piece of ribbon long enough to go around the top of the pocket and lap over slightly.  To make adhering the ribbon easier, I ran a strip of Scor-tape across the back of the ribbon.  Then I applied the ribbon around the top of the pocket, made a bow and attached it to the left-hand side of the front of the pocket.


Now it was time to finish decorating the front of the money holder.  On white cardstock I stamped, colored, and die cut Bumblebee Chloe.  I used some Wink of Stella on her wings to make them sparkle a bit.


Then I ran her through my Xyron sticker maker to make sure she had adhesive covering her entire back.


Again on white cardstock I stamped, colored and die-cut the Honey Pot, Honey Applicator and some bees from the Sweet Valentines set.


I cut a banner from a scrap piece of yellow cardstock and stamped the "Bee Happy" sentiment at the top, then attached the small die-cuts to the banner with foam adhesive circles.  I adhered the banner beneath the bow, using Scor-tape, and the Chloe "sticker" to the right side of the money holder.  All that remained was to put the money in the pocket between the front and back "shaker" sides.

This was a fun project, and I imagine I will be making many of these!  I hope you try one, too.

CottageCutz stamp/die sets used on this project are: