Friday, December 02, 2016

PURPLE BLOOMS ON CARD

Hello dear friends !!!!

How are you Christmas Preparations going on? Are flowers a part of your projects??
I love flower making and love all CottageCutz dies especially the flower making ones to create beautiful realistic 3D flowers.
You can check them out here.

I have some pretty purple blooms for you that will look good on any project. These are fun and easy to make. Please follow the video tutorial for this.
Here is my card.


Here is the Video tutorial for creating the flowers.


To finish the card, make a card base 7 inches by 5 inches. Stamp any script stamp with Dusty Concord Distress ink on the background. Add layers with CottageCutz Wide Rectangle Stitched die. Place another Double stitched rectangle die on top.  Add a sentiment in the centre.
Layer the flowers and leaves and arrange on the card.


List of supplies

CottageCutz Stitched  Wide Rectangle frame die
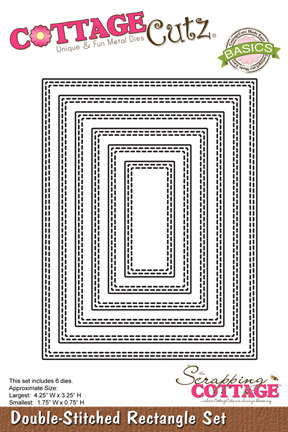
CottageCutz Double Stitched Rectangle set.
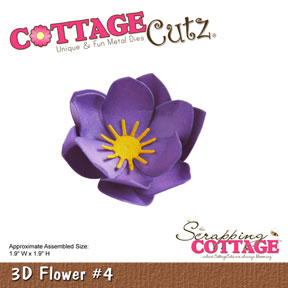
 CottageCutz 3D Flower #4
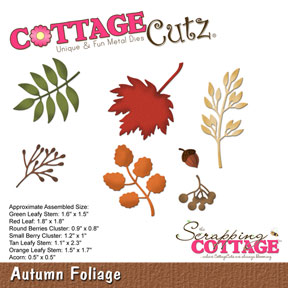
CottageCutz Autumn Foliage


Thursday, December 01, 2016

Butterfly Pop-Up Box Card

Hi, Lois here again today with an extra card for you this week.  Something you could give to someone "just because" -- just because you like them and want to brighten their day.


Supplies used on this box card are:

Yellow cardstock cut to 12" x 8 1/2"
Patterned paper cut as follows: 
     1 piece - 2 1/2" x 6 1/4"
     3 pieces - 2 1/2" x 3 1/2"
     6 pieces - 2 1/2" square
White cardstock cut to 2 1/2" x 6 1/4"
Narrow strips of acetate, approximately 3" long
CottageCutz dies - Butterfly with Flowers, Dragonfly Mini, Leafy Branch Mini

To make my box card, I first cut the yellow cardstock, scored it and cut the slits.


Next I cut the white piece and patterned papers to the sizes listed above.


Finally, I die-cut the small pieces.


After constructing the box and adhering the patterned paper, the box looked like this.


Then it was just a matter of adding two narrow strips of yellow cardstock to span the sides of the opening to act as a base for adding the die-cut pieces.  I've got a full, detailed tutorial on my blog showing how to make a similar box.  Check it out here.

Again, here is my finished pop-up box card.


The dies used for the contents of my box are:


Wednesday, November 30, 2016

Celebrating Bunny Rabbit

Hi, Lois here today.  I have to tell you that I have fallen in love with all those cute little critters in the October release from CottageCutz -- In the Forest.  Today I'm bringing you a card which I was a bit unhappy with initially, but with the addition of a couple of elements, I am quite happy.


Supplies for this card are:

Cream cardstock cut 8 1/2" x 5 1/2", folded in half
Chocolate cardstock cut 3 3/4" x 5"
Cream cardstock, kraft cardstock approx. 3 3/4" x 4 3/4" for cutting ovals
Patterned paper cut 3 5/8" x 4 7/8"
Scraps of cardstock red, green, white, black
Distress ink - Weathered Wood, Walnut Stain, Bundled Sage, Tumbled Glass
Markers - black, pink
CottageCutz dies -  Deer and Rabbit Peekers, Tree Stump and Log for Peekers, Earmuffs and Mittens, Balloon - Round mini, Celebrate, Double-stitched Ovals

I began by cutting out the pieces from the Deer and Rabbit Peekers, the Tree Stump and Log for Peekers, and Earmuffs and Mittens dies.


I then sponged some color on the rabbit and stump pieces to give them some depth. I colored the inside of the bunny ears and the nose with markers.


I cut out the layers and die cut the ovals . . .


. . . sponged some ink for the grass and sky on the cream-colored oval and constructed my card.  However, at this point I was not very happy with the card.  It definitely needed something.  The bunny didn't really look too happy peeking out from that stump.  I had an idea about how to cheer him up, so I die cut the balloon and the word "Celebrate."


Now, he looked better.  Here again is my completed card.


Tuesday, November 29, 2016

Exploring forest on four paws

Hi, Janja here!

Today I share with you another card created with "In the forest" dies. These are really great dies, and can be used for many occasions.
For the main image I chose a curious puppy, who went alone exploring the forest.


For the card we need:
- white card base: 4.3 x 5.5" (11 x 14 cm), folded
- light gray paper: 4 x 5.2" (10,2 x 13,3 cm)
- colored cardstock
- Distress ink: Antique Linen, Tea Dye, Brushed Corduroy, Mowed Lawn, Peeled Paint, Black Soot
- Distress marker: Vintage Photo, Walnut Stain
- Perfect pearls powder
- white color

Cut out puppy with die - forest peekers, beaver & dog. Shadow all pieces with distress inks and compose a puppy.


We do the same with the die - tree stump & log for peekers. Use brown cardstock, shadow it with distress inks and draw darker spots with a marker.
From green cardstock cut fern and grass. Use mushrooms & greenery die.
Now we need a snail and cute mouse. Cut out both with the forest critters die.


I did not really like selected gray paper, so I refreshed it.


Add a few drops of green and yellow ink in a mini mister together with perfect pearls powder for silky shine and water.
Shake it up well, and sprinkle the background.


When all the pieces are assembled and attached to the background, apply a white color with a sponge.


Completed card. 


That’s all for today. Thank you for coming over and have a great day. 

List of dies used:


Sunday, November 27, 2016

Winter Cheer!


Hello everyone,

It's Donna here sharing another Christmas card to share with you.  I hope all of you that celebrate Thanksgiving had a wonderful day on Thursday.  I had a great time with my family in North Carolina and to even top it off, the weather was fabulous, it was 73 sunny degrees there.

Have you heard about the BIGGEST SALE OF THE YEAR over at CottageCutz?  Yes, you can get up to 70% off your order!  Please hope on over to the store and see all the goodies you can get.


Also, there is a Black Friday Release. It's all about camping and forest friends.  You can get the whole bundle at 55% off click  here to see it.  


Now that I have given you all the news about the sale and the new release, here is my card.  I am using the adorable Candy Cane Penguin!  And guess what, it is 50% off in the store.  This one is a keeper for me, I love it and it is so easy to put it together.


Here is how I put my card together:

1.  My card is a 4 1/4 x 4 1/4 card,

2.  The first layer is 3 1/8 x 4 1/4,

3.  The pattern paper is 3 x 4 1/4,

4.  The next layer is 1 1/4 x 4 1/4,

5.  The penguin paper is 1 x 4 1/4,

6.  The circles are from the Circle Set, I used the largest and next to the largest for the layering, 

7.  I cut out all the pieces of the penguin, inked the edges, and glued the pieces together,

8.  I added the sentiment, and finished off the card with some glitter enamel dots.

Thank you so much for stopping by, please come back again soon!


Dies and stamps used:


Saturday, November 26, 2016

Christmas Holly Bells


Hello Scrapping Cottage friends! Thanks for taking the time to stop and visit today. It's Mary Marsh here bringing you the Saturday edition of the Blog.

Well our Thanksgiving Day has come and gone here in the US. We had a wonderful time with 4 generations sitting around our table having our Thanksgiving dinner. I spent days preparing for it and now it's time to think seriously about Christmas.

So if you haven't started your cards as yet, I am showing one today that could very easily be mass produced. You could change it up by simply using a different patterned paper. So let's get started on some details of how I created my card. The bells are part of the Christmas Holly Bells die and the corner holly is from the Holly & Berries die.

Looks like both these dies are on a 50% off sale. In fact there is a Black Friday blowout sale going on as well as a new Black Friday "camping" release. So it's a good day to shop with this being small business Saturday. Plus you can get some great deals on Christmas dies. Check out this Blog or our Pinterest Board for lots of inspiration from the design team.


Red Card Base: 4 1/4" x 5 1/2"
Medium Brown Layering Panel: 4" x 5 5/16"
Patterned Paper Layer: 3 7/8" x 5 1/8"

I started my card by choosing my patterned paper. That determined my card colors and the shades of red and green I would use for my holly die cuts. I used a real red and a ivy green cardstock. I cut the holly leaves 2x because I like a bit of dimension with my dies.

Cut all the dies and now I am ready for assembling. The bells are cut from a metallic gold on kraft cardstock. I thought this shade of gold went well with the patterned paper. I tried a lighter one but didn't like it as well.

Decided on my sentiment and stamped that in a real red ink on kraft cardstock.  I cut it out with the stitched rounded rectangle die.  It makes it stand out a bit and adds interest to the card. The patterned paper was a bit busy to stamp directly on there.

To complete my card I added a few drops of glossy accents to the holly berries. I hope this card has given you some inspiration. If you want to recreate it for your Christmas cards, the dies are on sale including the stitched rectangle die.

Well Blogger friends, that's it for me for this week so until next time.......inky hugs.


http://www.scrappingcottage.com/cottagecutzchristmashollybells.aspx
http://www.scrappingcottage.com/cottagecutzstitchedroundedrectanglesetbasics.aspx
http://www.scrappingcottage.com/cottagecutzhollyandberries.aspx