Wednesday, December 21, 2011

Just Chillin'

Hi , everyone ! 
Trust  this is the time to kick back the heels , sit back 
and catch our breathes a little in the days just before Christmas. LOL! 
And a card today that I can share that expresses that sentiment exactly - 
I have used the Snowglobe , Winter Accessories die for the 
Fishing Penguin . 
I have cut out most of the parts using white cardstock 
and used my current fave Pebbles Inc chalk 
and American Crafts Glitter Gel pens to color in . 


Warmest Wishes for a blessed Christmas time with you & yours ! 


Tuesday, December 20, 2011

A Touch of Sparkle

 A Touch of Sparkle. . . .Here I used glitter paper three different ways with the Cottage Cutz Dies. The first was the Cottage Cutz Celebrate the Season die. I cut the scroll verse from glitter paper than mounted on white card stock, than mounted on black card stock.. Added a dimensional 3/4" black card stock circle with a mini snowflake from the Cottage Cutz Snowman in Mug die. I also added some eyelash yarn in the same red sparkle as the verse around the snowflake.
 The second mini card I used the Cottage Cutz Filigree Snowflake die. I made a 4" x 4' Card with a 3" x 3" window, slipped the white glitter paper behind the window than mounted the tips of the snowflake to the frame. I than added a few clear and silver jewels to the snowflake.
 The third mini tag you can see only take a few cutz. I used the Cottage Cutz 3'x3' Snowflake Ornament die. The ornament was cut in white card stock first, than red glitter paper. I trimmed the edge of the ornament away on the red glitter ornament. . to use the snowflake only. I used a hole punch to cut the 2" black circle and a 3/4" for the small white circle.
Start your sandwich with the white mini circle glued behind the red glitter snowflake. Glue the red glitter snowflake on top of the white ornament, matching the pattern. Than glue the entire ornament to the black 2" circle. Added jewels to the tip of the red glitter snowflake and a large jewel in the center. Mounted on Silver card stock.

Added note: I used Black, Red and White with a bit of Silver on all the cards. The Black against the vivid Red and stark White makes a really good contrast. Black has become designer favorite at Christmas in the last two years.

Thanks and this will be my last post before Christmas .
. so Merry Christmas to all and to all a good 2012. 
. . . .  Barry


Monday, December 19, 2011

The Reason for the Season

Here we are, only a few days before the big day. I have a Nativity card for you today to help us all remember the reason for Christmas.

The Nativity die is a 4x6 die that comes with Mary, Joseph, the baby Jesus and a star. I made the stable and hay myself.

I hope you all have a Merry Christmas!
Kay

Sunday, December 18, 2011

Less is More, Sometimes

Hello Everyone!  Today I wanted to share a card that is different than my usual style.  This is clean and simple with high impact, I think.  I also wanted to show you that you do not need a Christmas tree die to make a Christmas tree.  I first cut a triangle in the shape of a Christmas tree, from glittered cardstock.  I cut several strips of paper using the Scallop Three Edger die from green patterned paper.  I then layered the strips onto the Christmas tree, offsetting each strip so the scallops were staggered.  I cut a brown tree trunk and then adhered the tree to a red card base.  I cut a strip of white glitter cardstaock with a slight wave for a hill.  Merry Christmas was written with a white gel pen, and a white snowflake was added for the tree star.  How do you use your dies in different ways?  I hope this inspires you to look at the possibilities your dies can create.  Thanks for stopping, as always.

Hugs and smiles,
Janice

Friday, December 16, 2011

Driving By With Merry Christmas Wishes!!

Good morning!  Lorie here today, and as the title says, I'm driving by this this cute little Santa to send you wishes for a VERY Merry Christmas!  I was so happy when this Santa's Truck with Tree die arrived in my mailbox, because I though he was SO stinkin' cute!!  I knew it would be loads (pun intended) of fun to work with, and I wasn't wrong!!  Here's my card using this adorable Cottage Cutz die.
I cut nearly everything with white card stock and colored with Copic markers, with just a few exceptions.  Now with this being Santa's ride, I just HAD to have a little bling, and glitter card stock fit that bill to a "T".   If you haven't asked Santa for all those Cottage Cutz dies that are on your wish list, then you'd better get to it.  Just eight more days, and the big day will be here!

Thank you so much for dropping by today.  I wish you a glorious Christmas filled with more blessings than your heart can hold.  Merry Christmas!!!!


Thursday, December 15, 2011

Flying By To Say Hi


I think I have been making Christmas projects since August - so I decided I needed a little break from the Holiday festivities! So I've got a card that is a little bit more spring inspired! I love the layering of the dies and patterns - I just think it makes for a fun card!

CottageCutz Dies
Bird With Flowers
Ornate Circle Frame
Leafy Foliage
Scallop Three Edger
Eyelet Edger

Other
October Afternoon Papers
Inspired By Stamping The Sky's the Limit stamp set
Want2Scrap Pearls
Worldwin Papers Cardstock

Wednesday, December 14, 2011

Quick but Beautiful Last Minute Gift


Are you needing a small little handmade gift for a teacher, hostess or friend?  I have an easy gift that really doesn't take long at all to make but is so useful.  A tissue box holder.  You can pick up wooden tissue box covers at your local craft store for just a couple dollars and then the creative fun begins. 


You can cover the box with just one sheet of designer paper...granted I used two but I just wanted the mixed up patterns.  Then just add a few die cuts and and your done.  Of course you can go more detailed if you want, but I figured I didn't want to much going on as you needed to be able to get to the tissue.


I used the beautiful Blossom Branch die.  I did ink up the center and some of the edges with a little distress ink and then cupped the flowers with my McGill paper tool to lift them up.  Easy Peasy...glued them down with some strong glue and topped them off with "of course" pearls.  I do love me some pearls, LOL. 

Have a great rest of the week and happy crafting.


Tuesday, December 13, 2011

Festive Penguin Ribbon Wreath

Good Morning Scrapping Cottage Friends! Angelica here with a SUPER simple, fun, festive ribbon wreath that you still have time for, even just a week or so away from Christmas. Whip up a few in an afternoon for your kid's teachers, neighbors and friends.


Starting with a small styrofoam wreath form, I wrapped some grosgrain ribbon in a muted shade of green all around my wreath, stopping at the bottom so I could wrap in an accent color. I placed dots of hot glue along the way (in the back). I then wrapped the bottom of the wreath in a red twill ribbon and secured to the back using my low-temp hot glue gun again. 

I even wrapped some baker's twine to anchor the red ribbon, but after I placed the snowflakes, it was hard to see. I cut out my Snowflakes 1 & 2 dies a few times and ended up using two of one of the snowflakes and just one of the other. It also would have been pretty to put them all over the wreath, but I really liked how the ribbon looked, so I chose to keep them on the bottom.  

I got the "peppermint" idea from The Twinery's Blog when Julie used her red twine to make holly berries. I think they look just perfect as peppermints, too! :)

The joyful penguin I added to the scene is from the Peachy Keen Penguin Doll die.

Hope you enjoyed today's inspiration! See you again right before Christmas! 


Monday, December 12, 2011

Gift Card Holder

Hello everyone, its Cheryl with a Gift Card Holder made for The Scrapping Cottage, and our Challenge #8 hosted by Pearl(square card& Embellished Cottage Cutz)
 I LOVE making these they are super fun and easy to make. 

Hope you will join us for her SUPER FUN challenge to make a Square Card & Embellish in 3-D a Cottage Cutz Die :) 
On my Gift Card holder i used the Christmas collection cottage cutz dies-
Ribbons
Pearls,Stickles,button

Here is the inside that holds the gift card. Also there is room to write on the inside, if i add another frame.

So for my Winter Bird i used design paper for the red and white. i added a black pearl for the eye, and then white pearls to separate the white and red. I added some red stickles to the wing. I wanted some greenery and added some to the botton of the bird with 2 candy canes.

I also stamped Merry Christmas from the Boxwood Vine and Wreath Cottage Cutz Die. love that this set has some stamps to match.


Thank you for looking and have a lovely day!


Hugs to all,
Cheryl

Saturday, December 10, 2011

Gift Tags with Matching Box

 Just in time for Christmas I created a gift box of gift tags. . a great gift for someone at the work, next door or that person who has everything . . and who has enough gift tags at Christmas anyway.
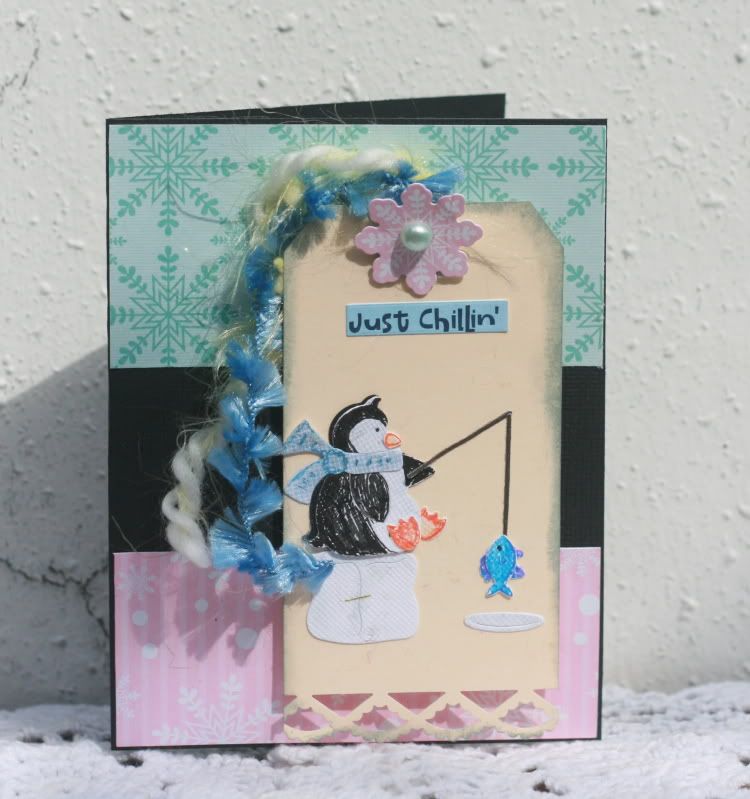
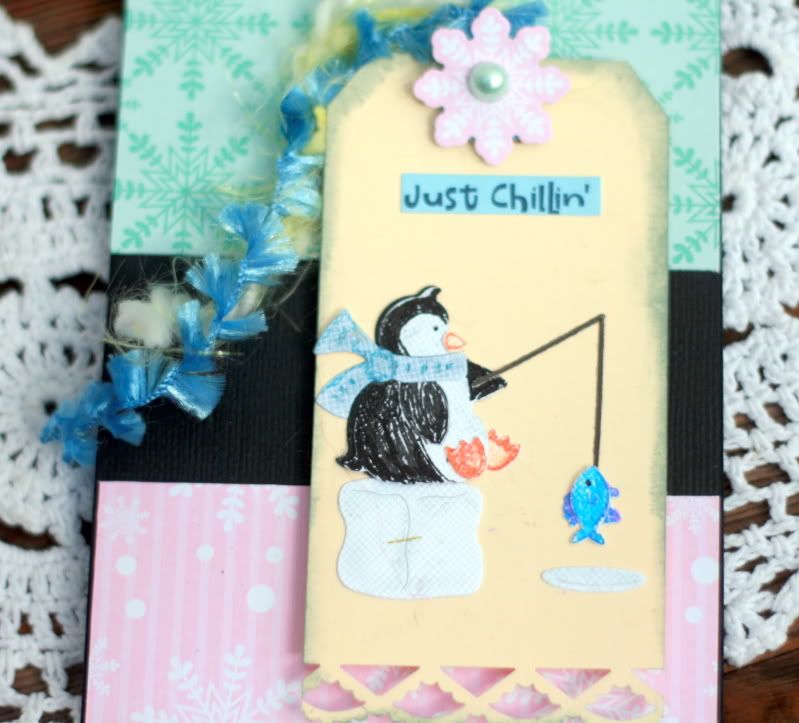
 The box 9" long, 2" high and 3" wide. I added a gift tag label and the above gift tag.  Notice the colors in the outer edge area's of the snowflake.
 Really easy to cut three each of the snowflakes from the Cottage Cutz Filigree Snowflake die. I cut one each of three colors of blue. Than took the large pieces that came out of each snowflake and added them randomly back into the other snowflakes. . .like a puzzle. This gave each snowflake a three color shadings without cutting the snowflake more than once.
 Than I randomly glued the snowflakes onto tags. Notice how I overlapped the snowflake. . that way the cut off of the other side of the same snowflake . . could use on the same tag.  I sponged a bit of blue ink around the edges of the white tag.
 For the additional three snowflake tags I used the Cottage Cutz Snowflake Doily die. Again cutting only three and using the tree shape pop out to fill the other snowflakes.
 I also added blue swirl lines with a rubber stamp to randomly fill the white area, than used Stickle on some of the blue ink lines and added a few jewels. The tags were knotted with a white sparkling wired rope cord. All six tags fit into the 3"x9" box to create the gift.
 Here I have shown you how I cut all the tags the same size on the top. Each tag was 2.5" x 6". when I found the angle that I wanted on the corners of one the tag. . I built a Jig, I rolled tape and put a triangle at the top of the cutter and than taped a scrap (green) of paper at the bottom, than all I had to do is lay the retangular tag into the frame (jig). . cut one corner, flip the paper and cut the other side. Every tag had exactly the same angle.
These are the the Cottage Cutz dies that I used for the seven tags.

Cottage Cutz . . Snowflake Doily 4x4 and Filigree Snowflake 4x4

Thank You and hope all of you are having a Merry Season. Barry

Scrapping Cottage Saturday Challenge #8 !

Hello, everyone ! 
Pearl here , back with a second Saturday Challenge for you this December ! 

Our winner for November's challenge is ...... Linda 
with her adorable entry here : 

Congratulations ,Linda ! 
You've won a $25.00 gift certificate to The Scrapping Cottage


And on to my December challenge for you : 

Make a SQUARE holiday card - any size - 
and decorate your Cottage Cutz die used with 3D embellishments. 


For my 6x6 square Christmas card sample here - 
I have used the Whimsical Tree die cut out of patterned paper. 
I chalked the edges and the embossed areas for more definition . 
And for some fun embellishments for the tree, 
I have added Eyelet Outlet's Holiday Sock Monkey brad, 
gingerbread man and some peppermint candy brads. 

We will choose one random winner and you will win a $25 Gift Certificate to the Scrapping Cottage! 
Link below and thank you for all your creativity. 


Friday, December 09, 2011

I love Snowflakes!

It seems like I'm always drawn to snowflakes and this CottageCutz Filigree Snowflake is no exception. I simply cut these out of a heavy white cardstock and then added Stickles, Star Trail pen and gems to embellish them.


The one on the right I glued down to the cardstock and the other one I applied mounting tape to it to give it some dimension.
Be sure to visit us tomorrow for our Second Saturday Challenge from Pearl.
Have a wonderful Friday!
Kay

Thursday, December 08, 2011

Santa has Laundry too!

For those that didn't get a chance to participate in the blog hop last weekend I wanted to share with you the card I made with Santa's Clothesline. Yes, Santa has laundry too - of course
Mrs. Claus gets to do that.......

This is such a fun die and makes a great rectangular card. I inked the edges, added some Stickles and some details with my Star Trail pen and used pop dots to give it more dimension.

I'll see you back here tomorrow with a new Christmas creation.
Have a great day!
Kay