Showing posts with label Thinking of You. Show all posts

Friday, November 24, 2023

Black Friday Release Inspiration

Happy Friday friends!

Kris here to share a card I made using our brand new BLACK FRIDAY RELEASE!!  There are 2 bundles of this release that are both on sale at 60% off!!  Or you can get the individual dies for 30% off.   See the whole release HERE.  

We also have our Mega Black Friday BLOWOUT SALE -- save up to 85% off! 


For my card today, I've used the Vintage Urn w/ Flowers die along with the Sentiment, Thinking of You die and mounted them on the new Trellis Background die.  

Design Steps:

I die cut the  Trellis Background die from white and mounted it onto a white A2 card base.  I kept it subtle so my flowers would pop and not get lost against a colored bg.  


Next I die cut my Vintage Urn w/ Flowers die from white cardstock and colored with Copic markers. 


I glued it to my card front. 


For my sentiment, I wanted it to match the colors of flowers, so I marked on some white c.s. with RV63 and RV66 first, then die cut my sentiment.  It's easier than to color the delicate die cutz after they are cut. 


So much to LOVE about this beautiful release!  

(Not to mention the fantastic prices right now)  ☺ 


Find more tutorials on our YouTube channel HERE.

Don't Forget our BLACK FRIDAY SALE - save up to 85% - ends Dec. 1st!


Sale prices do not apply to previous orders. Orders can not be changed, combined or 
canceled once placed via the website. Some items have limited stock on-hand, no backorders

will be accepted. Sorry e-mail or phone orders can not be processed during the sale.
Orders will be filled and shipped in the order they are received. $6.95 flat-rate shipping in
Continental USA, low international shipping rates available.
SALE ENDS Friday, Dec 1st at 9pm PDT

2 Release Bundles are 60% off!


Thanks so much for looking today ~ Happy Crafting!!

~Kristine

Wednesday, May 11, 2016

Thinking of You


Hello Scrapping Cottage Friends! Thanks for taking the time to stop and visit today. It's Mary Marsh here bringing you the Wednesday edition of the Blog. 

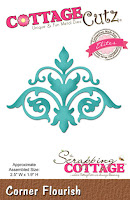
Today for your viewing pleasure, I am featuring another of the April release dies. This time it's the Corner Flourish Elite die. I paired it up with the Mushroom & Flowers die to create a thinking of you card.
My card this week started with a sketch and from there I chose my patterned paper and coordinating cardstock. There are many sketch blogs on the internet and this time I chose the MojoMonday sketch for my layout.
 
When you work with a sketch you don't have to follow it exactly. For instance, instead of the corner circles I used the corner flourish die. Let's get started with some more details on how I created my card. I hear card makers say that they struggle with card layouts. That's why I look for a sketch to help the process along. It just helps to get the creative juices flowing.
Cardstock and Patterned Paper Measurements:
  •  soft suede base measures 4 1/4" x 11" and scored at 5 1/2"
  • patterned paper measure 4 1/8" x 5 3/8"
  • tilted panel is cut with the CottageCutz square set. I used the largest one 3 1/2" x 3 1/2"
  • rectangle patterned paper is 1 1/2" x 4 1/8". Daffodil satin ribbon is 5/8" wide.
  • vanilla rectangle panel is 3 1/2" x 2 1/2"
For assembly: I die cut the corner flourishes in a light blue cardstock and attached with multi medium matte. I like this adhesive because it dries clear. I think the flourishes add an elegant touch to the card.
On the image panel, I used the flower from the mushroom & flowers set and cut in daffodil cardstock. I love the detail on The CottageCutz dies as well as the additional pieces that come with them. For instance, I was able to cut the pistil in the soft suede color for some great contrast. I am not a gardener, that duty falls to my hubby, but I think that's what this part of the flower is called (lol)!!!
For the sentiment, I used the thinking of you die and cut in the soft suede cardstock. I also used the multi medium matte to adhere the words. I scattered a few sequins and that completes my card for this week.
See you again next Wednesday Blogger friends! Until next time......inky hugs. If you have any questions about what I have created just ask. I will get back to you with an answer.


http://www.scrappingcottage.com/cottagecutzsquaresetbasics.aspx
http://www.scrappingcottage.com/cottagecutzmushroomandflowers4x4pre-order.aspx
http://www.scrappingcottage.com/cottagecutzcornerflourishelites.aspx
http://www.scrappingcottage.com/cottagecutzexpressionsthinkingofyou.aspx


Thursday, April 07, 2016

A FLORAL CARD AND A VIDEO TUTORIAL


Hello friends,

Hope you are having a great time.

I am Anita Kejriwal here with a beautiful new project for you. This is a floral card with daisy flowers and I have used CottageCutz dies to create this entire card.

CottageCutz has released some amazing new dies to create 3D flowers and over the next few weeks, I will be using these to create many new types of flowers and also with tutorials for some of them.

In this post, I will show you how to create this daisy flower with the CottageCutz 3D flower #1.

So do have a look at this card.


Here is the Video Tutorial on how to make these flowers.


To make the base of the card--

1. Cut a piece of card stock measuring 10 inches by 7 inches and score at the 5 inch mark, fold to make the card base. The finished card measures 5 inches by 7 inches.

2. Cut a piece of card stock measuring 4.75 inches by 6.75 inches and on top of this adhere a piece of pattern paper measuring 4.5 inches by 6.5 inches.

3. Cut three die cuts from the  CottageCutz Stitched Wide Rectangle Frame set and adhere on to the front of the card using foam tape and as shown on the card.

4. Cut the Thinking of You die cut in black card stock from the CottageCutz Expressions Thinking Of You die and adhere to the card as shown.

5.Make flowers using the CottageCutz 3D flower#1 die as shown in the video tutorial above and arrange on the card along with CottageCutz Leafy Foliage die cut three to four times in light green and dark green card stock.


I hope you enjoyed the video . Do leave your comments. If you have any queries regarding making this flower , please free to ask. Keep crafting and have a good day !!!


Monday, March 14, 2016

Lisbeth Butterfly Card

Hi Everyone, Jenny here to show you how to make this sparkly 3D butterfly card. It is a fast card to make so consider making a few.

Let’s get started!

Take a 4.25 x 5.5 piece of cardstock and use this for your base. I used purple, you can use any color. Just match your decorative elements to your selection. I did a fun spray background, you could skip this part to speed up your card making but it adds another layer of texture. Take a piece of white cardstock measuring 4 x 5.25. (I used watercolor paints to match my cardstock choices, pink and purple) Take an old tooth brush and load it with some inky paint. Run your nail down the bristles and spray some color on your paper. The spray is light but noticeable. That is why I used watercolor paints, it dries light. Since I didn’t use a lot of water, the paper did not warp. Set this paper aside to dry.


 While that layer dries, select a complementary paper color and cut a circle with the Circle Set. (Use the third circle from the outer edge) Then cut a white circle with the Stitched Circle Set. (Use the fourth one from the outer edge). I used a pink outer circle with a white inner stitched circle. Attach them together with your favorite adhesive. Set aside and pick two colors for your butterfly. I chose purple and pink. Cut a base butterfly using the solid butterfly from the Butterfly, Lisbeth set. Cut a detailed butterfly from your other choice of color (I added some extra sparkle to my detailed piece with a Wink of Stella pen. This again is optional.). Don’t forget to cut a body too.  Layer them together and add liquid glue along the center piece. Do not glue down the wings. That is where we will get our 3D effect. Add the body on top of the detailed layer as shown. When the body dries, take a pencil or dowel and curl the top layer of the wings around it. This will lift the wings and also show the sparkle details.
 

 To get the dimensional wording, I used fun foam. If you don’t have fun foam you can cut the wording out several times on white cardstock and glue them together to form the base and attach the top layer with your choice of color paper. I used fun foam and cut out the words, “Thinking of you” from CottageCutz Thinking of You set. I cut a set out of pink cardstock and added some Wink of Stella again, to add some sparkle and make it coordinate with the butterfly.


Now that the main piece is dry, take some coordinating washi tape and add some strips down the front of the card as shown. This adds more dimension without adding bulk. ( If you do not have washi tape tear some strips of decorative paper and attach. Use what you have on hand. If you want you can add ribbon, twine, or leave it blank)
 

 Assemble the components as shown in the picture. Attach the white painted cardstock to your base layer.  Layer the butterfly circle piece you created with dimensional squares to give more drama. Attach the “Thinking of you” embellishment with your liquid adhesive. Then you are finished. If you would like more “sparkle” as I did, add some colored sequence randomly around the card.


Friday, May 02, 2014

Thinking of You

Happy Friday!

Kathy here with you!  Today I have a “Thinking of You” card using the Thinking of You Expressions, Strawberry Delight and Flower Vine CottageCutz Dies from The Scrapping Cottage.


To make my card, I started with a white card base, added light blue gingham paper with a piece of red gingham ribbon over the bottom of it.  The Flower Vine, leaves and strawberry tops were cut with green designer paper. The sentiment, strawberries and flowers were cut with Real Red card stock.  The bowl for the strawberries was cut with flowered and blue designer papers and I cut the rim a second time with Real Red to go under the blue rim.  The designer papers are all from Nana's Kitchen by DCWV.

For the bowl of strawberries, I cut an extra single strawberry and popped the two singles behind the trio of strawberries.  The little flower in the top right corner is part of the Strawberry Delight Die that you can also place on the bowl.  I decorated the flowers a little with some liquid pearls and a white gel pen after shaping them.

I finished the card with a triple loop bow using Moss Seam Binding and added a red button threaded with blue twine making a bow in the back of it.

These are the dies I used: