Showing posts with label Spring Watering Can. Show all posts

Sunday, February 28, 2021

Spring Window


Hi!

It's Anja here. I have a spring inspired card for you today.

For this card I used: 

- Cottage Cutz dies (Spring Window w/Vine, Spring Watering Can, Daffodil Duck, Spring Grass),

- Distress Inks,

- white card base (11x14,5 cm),

- white card stock for die cuts and background (10,5x14 cm),

- embossing folder (bricks),

- silver pigment ink,

- scissors,

- pencil,

- yellow liquid drops,

- paper glue. 


First I made a stencil for the window. I cut all the inner parts and used the frame to draw the window on the background paper. I used scissors to cut it out.

Next I embossed the background. I used grey ink to color the folder before embossing and again to emphasize the edges.

Then I colored the window. I also used the cut frame. I glued the whole window on the back of the background and the frame on top.

Next I cut and colored the can, flowers and all the other greenery. I cut two cans to gain some dimension.

Then I arranged all the parts on the card base and adhered it. Last I added liquid drops to the middle of the small flowers and let it dry.

And my card was done.


Before I go I want to invite you to The Scrapping Cottage online store. All the dies I used for today's post are part of the Spring Sale.

Have a nice Sunday and see you again next week.

Anja Z. 


Cottage Cutz dies I used for today's card:


Tuesday, February 04, 2020

Spring Flowers

Hi! Janja here with you. Spring is not so close yet, but I can hardly expect to enjoy the warmth of sun rays and the smell of fresh spring flowers.
For today's post, I made a birthday card with spring flowers.


- CottageCutz dies: Spring Watering Can, Butterflies, Nested Stitched Scallop Rectangle Set
- blank card: 4.4 x 5.6" (11,2 x 14,2 cm)
- patterned paper: 4.2 x 5.4" (10,7 x 13,8 cm)
- colored cardstock
- colored ink pads
- vellum paper
- embossing powder - white
- clear embossing ink pad
- craft foam (fun foam)
- Distress Collage Medium - matte
- glue, double-sided adhesive tape, self-adhesive foam pads

I started making my card by die-cutting all the pieces for it. I added extra shading on the cutouts with colored ink pads.


I cut out two patterned papers and with foam mounted one on top of the other.
I cut out a strip from vellum paper and heat-embossed the sentiment. After that, I added Distress Collage Medium - matte only to the side edges and attached a vellum strip to the prepared background.


I finished the card by adding a butterfly.


A new Spring release is available at the online store. New dies are 25% off for a limited time.

Have a nice day.
Janja


Tuesday, March 26, 2019

Easter Wreath

Hi, Janja is here with you.
You have probably started looking for ideas and decorations for the Easter.
While I'm waiting for the spring dies I prepared an Easter card with some older dies.


- CottageCutz dies: Egg Painting Bunny, Spring Watering Can, Be My Valentine Puppies (banner), Build-A-Grapevine Wreath
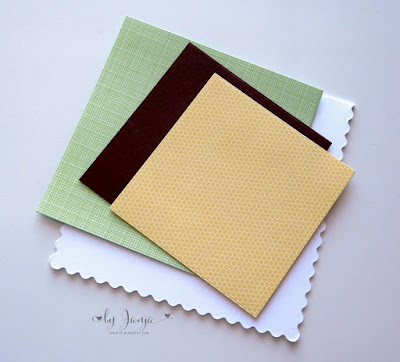
- white scalloped card base: 5.3" x 5.3" (13,5 x 13,5 cm), folded
- patterned paper: 4.7" x 4.7" (12 x 12 cm)
- patterned paper: 3.7" x 3.7" (9,5 x 9,5 cm)
- colored card stock
- colored ink pads
- glue, double-sided adhesive tape, self-adhesive foam pads

From colored card stock cut out bunny, eggs, wreath and flowers with greenery. Emphasize edges with colored pads.


Cut out a banner and stamp a sentiment.


Prepare a card base. Trim brown card stock and two patterned papers.


Gradually attach all the elements to the wreath with glue.


Completed card.


Have a nice day.
Janja


Thursday, April 05, 2018

Spring is Here!


Good Morning Friends

It is Pam getting crafty with you today!

It has been such beautiful weather here in South Carolina that I have been able to clean out my flower beds.  We had a cold winter and even snow.  So some of the more tropical plants didn't make a come back this spring.  I am going to have to pick some new plants to replace the ones that didn't make it.  So with plants on my mind that was my inspiration for my card this week!
 Design Steps:
1.  Cut out the water can in silver metallic paper using the Spring Watering Can die.  Next cut out all of the flowers and leaves in white using the same die.  I cut out 2 each of the flowers and 3 of the leaf stems.
2.  Color the flowers and leaves using copic makers. Add shading to the watering can using copics
3.  Tape the leaves and flowers to the back of the watering can
4.  Cut the hello using the Hello Spring die.  I cut one in yellow and one in gray.  Glue the gray one in the back of the yellow one slightly off center.  Also cut a frame using the Pierced Wide Rectangle Frames dies the second from the largest in vanilla card stock
5.  Use a vanilla A2 card base a yellow piece cut to 4 x 5 1/4 and a piece of DP 3 3/4  x 5.  Make sure to add the ribbon before you glue the panel to the front of the card. Add the vanilla frame to the card just slightly to the left of center
6.  Add the watering can onto the frame as shown
7.  Place the hello to the upper right side of the card and it is complete
Cottage Cutz Products
I hope you check out these cute dies in our store today!  
This card would make a great Mother's day card too!
Blessings
Pam