Showing posts with label Spring Hot Air Balloon. Show all posts

Friday, March 22, 2024

Miss Spring Bunny & Hot Air Balloon

Hello, welcome back friends!

Kris here to share some Easter inspiration with you!

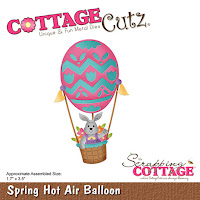
This Easter card is cute and SO EASY to make!  It features Miss Spring Bunny and the Spring Hot Air Balloon dies


I also want to point out that you have until 9 PM (Pacific) TONIGHT to take advantage of this:


DESIGN STEPS:

I die cut Miss Spring Bunny and the Spring Hot Air Balloon from white cardstock and colored with Copics, then assembled.

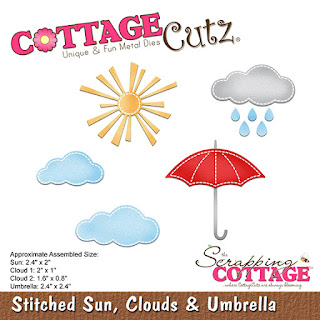
I also die cut the clouds from the Stitched Sun, Clouds and Umbrella die

(aren't these adorable?!)

I decided to make this a 4" x 6" card to get the height needed for the hot air balloon.  I cut a piece of white cardstock at 4 x 6" then I used the largest Scalloped Rectangle die and used the "die extension" method to make it fit within my 4 x 6" with an equal border all around.  

Next, I used one of the Grass Slimline dies to cut grass into the bottom portion of my scalloped panel.  Instead of layering my grass on top, I fit it back into the cut out section like a puzzle!  That way I have scalloped edges all around the 3 sides of my grass layer!  ☺ 


I added Distress Oxide ink to both pieces; Peacock Feathers for the top and Twisted Citron & Mowed Lawn for the Grass. 


I added my clouds and stamped a sentiment on grass, then layered onto a piece of white cardstock cut a li'l larger.  My card base is cut at 6" x 8" and scored in half at 4".  I popped my Bunny and Balloon onto front with foam tape.


Thank you so much for taking a peek today! 

HAPPY CRAFTING!!

~Kristine

Head over to Cottage Cutz and do a little shopping today!

Get Social With Cottage Cutz

Friday, April 06, 2018

Sending Smiles Across the Miles

Good morning Cottage Cutz fans!  It's Jeanne today with a card that will surely brighten the day of someone far away.  This card features the Spring Hot Air Balloon and the Stitched Sun, Clouds and Umbrella dies.
I started with an A2 red card base and a blue panel cut to 4 x 5 1/4 inches.  I used a paper printed to look like watercolor.  Normally I like to watercolor my own backgrounds but this is nice if you're pressed for time.
Next I cut all the pieces - some from colored card stock and others from white.  I used the background of the balloon but not the front piece to keep it from looking Easter-ish.  The rectangle for the sentiment is cut from the second smallest Nested Wacky Stitched Rectangle set.
I colored the rabbit, basket fringe and tassel pieces with Copic markers and used a sponge dauber with Crumb Cake ink to add some shadow to the basket.  I then assembled the pieces.
I glued the sun in the upper right corner, letting some of the rays hang off.  I used paper snips to clip off the over hang.
I glued the sky panel to the front of the card and arranged the clouds and sentiment panel.
Finally I used foam tape to pop the rabbit and basket off the card front.
I hope you enjoyed today's card.  It would surely bring a smile to a loved one's face!

Dies used:
http://www.scrappingcottage.com/cottagecutzspringhotairballoon.aspx
http://www.scrappingcottage.com/cottagecutzstitchedsuncloudsandumbrella.aspx
http://www.scrappingcottage.com/cottagecutznestedwackystitchedrectangleset.aspx


Thanks for stopping by today!  I hope you have a fun weekend and have time do some crafty things!


Monday, March 05, 2018

High Flying Bunny


Hi, Lois here today.  One of the things from my bucket list that I have been able to cross off is flying in a hot air balloon.  It was so quiet up there (except when they turn on the flame to get more hot air into the balloon).  So, when I saw this cute new die from CottageCutz, I knew I would have to make a card with it.


It was a pretty simple card to construct.  I cut the cardstock and paper as follows:

White - 8 1/2" x 5 1/2"
Navy - 4" x 5 1/4"
Cloud paper - 3 7/8" x 5 1/8"


Then I gathered some scraps of various colored cardstock and cut the bunny and balloon.


The clouds are cut from one of the new stitched dies from CottageCutz.  I stamped my Happy Easter sentiment on the larger cloud.


All that remained was to construct my card.  I used the illustration on the front of the Spring Hot Air Balloon package as my guide.  Easy Peasy!


Both the Spring and the Stitched series of dies are still 25% off, so be sure to check out the Scrapping Cottage/CottageCutz store for the entire line of dies.  CottageCutz dies used on my card are:

http://www.scrappingcottage.com/cottagecutzspringhotairballoon.aspx

http://www.scrappingcottage.com/cottagecutzstitchedsuncloudsandumbrella.aspx


Saturday, January 27, 2018

Spring Hot Air Balloon Hello (new die release)

Hello Scrapping Cottage friends! Thanks for taking the time to stop and visit today. It's Mary Marsh here bringing you the Saturday edition of the Blog. Hope you are staying warm during this cold snap that is currently with us.

Here is some good news that comes in the middle of winter! We have a new release of dies. There is a In-Stitches release with 12 new dies and a Spring release with 21 new designs. And, some other good news is that for a limited time, you can get the new dies at 25% off.

Today, I am using the Spring Hot Air Balloon die and the Stitched Sun, Clouds and Umbrella die. I thought I would create a thinking of you type card today. So let's get started with some details on how I created my card.

Step 1: With the hot air balloon die, I knew I would be creating a sky scene with some clouds and the balloon floating. I found this pattern paper in my stash from a serene scenery collection that worked well for this card.
I used a kraft cardstock as the layering panel for the patterned paper and a cardstock called island indigo for the card base.
Card Base: 4 1/4" x 5 1/2"
Kraft panel: 4 1/8" x 5 3/8"
Patterned Paper: 3 7/8" x 5 1/8"
Step 2: I cut the hot air balloon and the stitched clouds. When I cut my dies, I used different color cardstock as opposed to coloring each piece. I like how colorful the balloon turned out.
For the balloon:
kraft for the balloon basket
berry burst for the balloon
lemon-lime for the chevron and other shapes - I did an inlay technique here
light gray for bunny
pink for her outfit
Step 3: Now that the dies are cut and assembled, I started the card assembly. I adhered the base and panels with double sided tape. I did that before I stamped my sentiment. It's not how I usually like to do it but my ideas were running ahead of me this week (lol)!!
Used the stamp-a-ma-jig to get the right placement for the sentiment. I stamped with black ink since it was going right on the patterned paper.
With the stamp-a-ma-jig you first use the purple positioner and place against the plastic stamping card. You stamp your sentiment using the purple positioner as your guide. Then you take the plastic and place it over your cardstock in the area where you want to stamp. Once its straight you remove the plastic.
You again use the purple positioner as the guide for your stamping block and stamp the sentiment.

This photo is showing the plastic piece placed over the paper and the purple positioner holding it in place.
The balloon and one of the clouds was adhered with dimensional adhesive.
I felt like the card still needed something else so I scattered a few sequins. They seem to be my go to embellishment these days. I think they were a good finishing fit for my card.
Well that's it for me for this week. I hope I have given you an idea on a way to use this new die. The Design Team will have lots of samples to show over the next weeks. Lots of cute and fun ideas for Easter or Spring cards.
And remember, these days are currently 25% off the regular price for a limited time.

Dies I used to create card:
http://www.scrappingcottage.com/cottagecutzspringhotairballoon.aspx
 
http://www.scrappingcottage.com/cottagecutzstitchedsuncloudsandumbrella.aspx