Showing posts with label Pine Spray. Show all posts

Saturday, December 02, 2017

Joy Nativity in a Z-Fold Card

Hello Scrapping Cottage friends! Thanks for taking the time to stop and visit today. It's Mary Marsh here bringing you the Saturday edition of the Blog. Hope you were able to jump in on some of the huge savings with our Black Friday sale that was held on the online store.

Today, I am back to Christmas cards. The time is getting shorter and I need to finish up my cards for this year. That is my plan for this weekend. For this post, I decided to make a Z-Fold card and feature the Joy Nativity and Angel Trio dies. So lets get started with some details on this card.

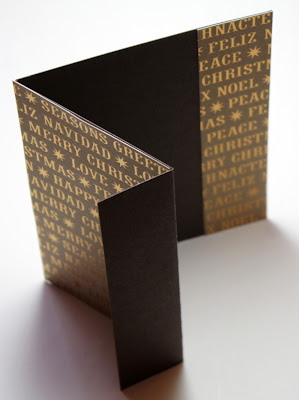
Step 1: this week I started my card with the fancy fold I wanted to use. I like the Z-Fold and thought it would work well with the dies I wanted to showcase. This fold makes a very nice card presentation and is not difficult at all to make.

Dark Brown Card Base: 5 1/2" x 8 1/2"
Step 2: Cut 2 pieces of patterned paper- one is 3" x 5 1/2" and the other is 1 1/4" x 5 1/2".
Attach the 3" piece to the cardstock between the scored lines.
Turn the card over and line-up the 1 1/4" patterned paper to the corner of the card.
Used my bone folder and reinforced the scores that I made on the cardstock. I folded back the score line on the 1 1 /4" panel and now I have my Z-Fold card.
 
 
Step 3: I created the front panel for my card. I used one of the angels from the Angel Trio die and on the square panels I used the Stitched Square (4th largest) and the Square Set (3rd largest) dies.
Assembled the square panels and attached the angel with dimensional adhesive.
I used doubled sided tape and attached the panel to the 1 1/4" panel.
Step 4: Now onto the inside of the card. I used the Joy Nativity die for the inside panel. I also used another of the angels from the Angel Trio die.
Attached the pieces to the card inside with glue dots and Ranger Multi medium matte adhesive. After I attached the kneeling angel I decide to add a few pine sprays to ground the image. I also added some stars to this panel. I used the stars from the Snowglobe Friends die.
I also added stars to the front image panel to complete my card. That's it for me for this week. I hope I have given you an additional idea for a Christmas card. Especially if you bought these dies when the big sale was going on. See you next Saturday!
 
 
Dies I used to create card:


Saturday, October 07, 2017

Give Thanks

Hello Scrapping Cottage friends! Thanks for taking the time to stop and visit today. It's Mary Marsh here bringing you the Saturday edition of the Blog.

Just as a reminder, CottageCutz has a new release of Halloween & Christmas dies that are now available in the online store for ordering. The DT has been showing lots of great samples and will continue to show them over the next couple of months to get your creativity flowing. There are plenty of beautiful new Christmas dies  and something for everyone's tastes.

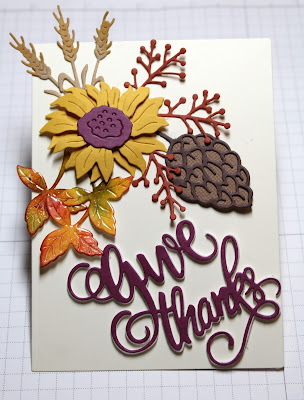
Today, I used a new Christmas die, Pine Spray, to create a Thanksgiving card. I  love celebrating the Thanksgiving holiday and making Thanksgiving cards to send out to family and friends.  So let's get started with some details on how I created my card.

Step 1. I found this Give Thanks word already die cut and placed on vanilla cardstock. The words are cut in a rich, purple shade and popped up on fun foam It gives great dimension. So that determined the other colors I would use on my card. The card base is the purple and my layering panel is a curry color. I think they make a great fall combo.
Razzleberry Card Base: 4 1/8" x 5 1/2"
Curry Layering Panel: 3 3/4" x 5"
Image Panel: 3 5/8" x 4 7/8"
Step 2: Since this is a fall card I wanted some fall leaves in addition to the other elements. I cut 3 leaves from the Pine Spray die in white cardstock. I sponged with various distress inks and then pressed them into a Versamark ink pad and clear embossed.
Step 3: Again using the Pine Spray die, I cut the pine cone and some sprigs. I cut the pinecone in 2 shades of brown cardstock and the sprigs in a cinnamon cardstock.
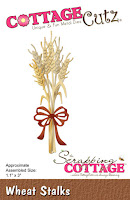
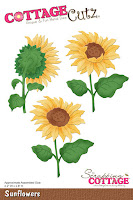
I also used the Sunflower and Wheat Stalks dies- these are older CottageCutz dies- for additional elements on my cad. The sunflower is cut in curry cardstock and the center is razzleberry cardstock. For the wheat, I used a kraft cardstock and then sponged with some fossilized amber ink. 
Step 4: On this step, I figured out the layout for all my die cut elements and adhered them to the image panel. Used dimensional adhesive on the sunflower to left it from the background. On the other elements I used glue dots and multi matte adhesive.
I attached it to the curry panel with double sided tape.
 
To complete my card, I attached it to the Razzleberry base and then scattered a few sequins. I hope I have given you an idea on a way to user the Pine Spray die other than for Christmas. Well, that's it for me for this week. See you next Saturday.
Dies I used to create card:
 
http://www.scrappingcottage.com/cottagecutzpinespray.aspx

http://www.scrappingcottage.com/cottagecutzwheatstalks.aspx

http://www.scrappingcottage.com/cottagecutzsunflowers.aspx
 
http://www.scrappingcottage.com/cottagecutzgivethanks.aspx


Friday, September 22, 2017

Chickadees for Fall

Happy autumn everyone!  It's Jeanne sharing today and I am so happy fall is here -it's my favorite season.  To celebrate I made a card with an autumn feel.
These chickadees are part of the new release and come with both stamp and die.  To make the card, I first colored the birds with Copic markers and cut them out using the coordinating die.  Next I cut an A2 sized panel out of the gingham paper along with a 1 1/2 x 5 1/2 inch strip of dark red card stock.  I used the largest Nested Wacky Stitched Rectangle die to cut the white panel.
Then I stamped my sentiment in dark brown on the stitched panel.  I love how this sentiment goes with the songbirds!
I used several shades of green and two shades of brown to cut the foliage from the Pine Spray die.
Next, I adhered the panels down, offsetting the stitched panel so that I would have room on the left for the large sprays.  I love asymmetry in design and think this works well here.
I used several of the foliage leaves that I cut but not all.  After I had decided on placement, I glued them in place and used foam dots to adhere the birds.

http://www.scrappingcottage.com/cottagecutznestedwackystitchedrectangleset.aspx

Thanks for stopping by and I hope you have a great weekend!