Showing posts with label Leafy foliage. Show all posts

Monday, May 07, 2018

Rose Heart Birthday

Hi, Lois here today still playing with the new Mother's Day release from CottageCutz.  Today's card features a pretty "flower" die -- the Rose Heart.  Be sure to check the CottageCutz website.  They're still celebrating National Scrapbook Day, which was Saturday.  You can save up to 50% on CottageCutz designs.


To start my card, I gathered my cardstock:

Pink - 8 1/2" x 5 1/2"
White - 4" x 5 1/4"
Scraps of green, pale pink and dark pink (big enough to fit the dies)


I then cut out the leaves and heart from the green and pale pink scraps.  Before I cut the heart, I used a sponge dauber and sponged on some Ranger Spun Sugar ink to the center of the pink piece.  This gave the center of my "rose" some depth.


I glued down the leaves to the white panel and the rose to the dark pink scrap and then cut out the two-level rose with scissors.


I attached some foam pop dots to the back of the rose and placed it within the leaves, adding the extra single leaves to the branch.  After stamping the birthday sentiment in the upper right-hand corner, I scattered some small sequins around the card.  And I was finished!


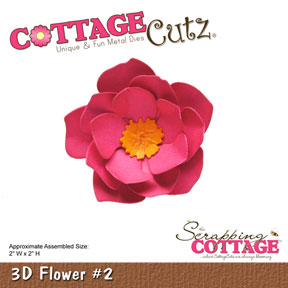
CottageCutz dies used on my card are:

http://www.scrappingcottage.com/cottagecutzroseheart.aspx

http://www.scrappingcottage.com/cottagecutzleafyfoliage4x6pre-order.aspx


Sunday, April 08, 2018

Flowers for Mom

Hi!

It's Anja here. My mom is celebrating her birthday this week and I was looking for ideas for her birthday card. I tried out foam flowers and I love the effect. I think I will make some more in different colors.


For this card I used:
- Cottage Cutz dies (3D Flower #1, 3D Flower #2, 3D Flower #7, Leafy Foliage, Oval Set, Nested Stitched Scallop Oval set, Sugar & Cream Alphabet),
- Distress Inks (Aged Mahogany, Forest Moss, Worn Lipstick, Fired Brick),
- foam in different colors,
- craft card base (15x15 cm),
- patterned paper (14,5x14,5 cm),
- white and craft card stock for die cuts,
- flower stamen,
- green tape for flowers,
- iron,
- silicone glue,
- paper glue,
- wire,
- embossing tools.

First I die cut the flowers and leaves, using foam. I colored the foam with Distress Inks.


Then I used the iron and heat all the pieces.


You don't have to heat it for a long time. The foam shrinks and it peels of the surface. Then I used embossing tools to add some more shape to the flowers and leaves.


I used flowers stamens for the middle of the flower. I used a bit of wire to pull it trough the flower.


Then I taped t with this green adhesive tape that's used for making paper flowers.


I made all the flowers in the same way. When I had the finished I cut patterned paper for the background.


Then I die cut oval shapes for the front and inside of the card. I also cut letters from craft card stock.


When I had everything cut I started with adhering. I used silicone glue for adhering flowers to the front of the card.

And this is the finished product.


Have a nice Sunday!
Anja Z. 


Cottage Cuts products I used:


Monday, April 10, 2017

Framed Plumeria

Hi, Lois here with my Monday post.  Before I tell you about my card for today, I want to let you know that CottageCutz has some brand-new baby dies in the store.  Be sure to check them out -- they're on sale at 25% off the regular price.  Today I've made a card using some more new-to-me CottageCutz dies. I love making shaped flowers, and the Plumeria die allowed me to have a bit of fun.  I thought I was unfamiliar with the plumeria, so I Googled it.  As it turns out, the frangipani is a common variety of plumeria -- and I actually had a frangipani in my yard at a house in which I lived many years ago.  Here's my card:


Supplies used on this card are:

Orchid cardstock - 5 1/2" x 8 1/2" folded in half, scrap for circle
Pale orchid cardstock - approximately 3 1/2" x 4 1/2"
Patterned paper - 4" x 5 1/4"
White cardstock - approximately 4" x 5 1/2" to cut frame, scrap for circle, larger piece to cut flowers
Green cardstock - large enough to cut leaves
Scrap of yellow cardstock
Sentiment stamp
Copic markers - Y02, Y04, Y21, RV00, RV63, E71
Green ink
Embossing folder
Micro glue dots
Circle punches
Foam tape
CottageCutz dies - Plumeria and Leaves, Leafy Foliage, Pierced Wide Rectangle Frame Set

I must admit  that, when I start a card, I do NOT meticulously plan out what it is going to look like.  I usually have half an idea in my head and sort of roll with it, and I wasn't sure just how many flowers and leaves I was going to need to complete my card.  So I cut several sets of the Plumeria and Leaves, plus one set of the Leafy Foliage.


As I mentioned before, I didn't think I knew anything about the plumeria; so, in order to color the petals, I Googled "plumeria" and found this photo.


Using several shades of red-violet and yellow, I colored all my die-cut flowers.


Using a sponge, I gave the leaves some shadowing; and I colored the branches and the flower centers with Copic markers.


As you can see on the photo of the plumeria flowers, the petals are slightly layered over each other.  So I snipped between the petals and, using micro glue dots, layered the petals over each other so they looked a bit more realistic.


Then I cut the pieces to make the card base . . .


. . .  and constructed my card.  Before adhering the background inside the frame with foam tape, I embossed the pale orchid piece of cardstock.  Here is a close-up showing all the dimension created by layering the leaves, flowers, and frame.


I then stamped the sentiment, punched it out, layered it on a punched orchid circle and adhered the circle on the side of the frame.  By the way, I still have some already-colored blossoms left that I can use for another card!


CottageCutz dies used on this card are:


http://www.scrappingcottage.com/cottagecutzplumeriaandleaves4x4pre-order.aspx


http://www.scrappingcottage.com/cottagecutzleafyfoliage4x6pre-order.aspx


http://www.scrappingcottage.com/cottagecutzpiercedwiderectangleframesetbasics.aspx


Tuesday, May 24, 2016

In a gilded frame

Hi, Janja here!

CottageCutz frame dies are so useful that they belong in my go-to collection. The card for today's post is also spiced up with a frame covered with a thin layer of golden flakes. On the frame I put a leafy foliage with flowers.


For the card we need:
  • brown card base: 4.53 x 5.70" (11,5 x 14,5 cm), folded
  • corrugated cardboard: 4.3 x 5.5" (10,8 x 14 cm)
  • brown cardstock: 3.9 x 4.9" (10 x 12,5 cm)
  • white cardstock
  • Distress inks: Milled Lavender, Spun Sugar, Victorian Velvet, Aged Mahogany and Moved Lawn
  • Memento inks: Cantaloupe, Pear Tart
  • golden flakes
From white cardstock cut flowers and leaves with 3D flower #1 and leafy foliage dies. Cutouts of flowers and leaves are then shaded and shaped. For flowers use only the smallest die cuts.


With the largest die from the stitched wide rectangle frame set, cut out the frame and brush it with a copper metal paste.


When the frame is dry, apply the adhesive with a sponge on few places. Sprinkle it with golden flakes. With fingers press them gently for perfect bonding. We remove the surplus flakes with a sponge.


The frame is very shin, although I have not been able to catch its glow on photos. 


Put it on the brown cardstock, mark the inner part of the frame and cut it out. Corrugated cardboard is part of an old package. 


Assemble the card.


And don't forget on our May challenge - Hello spring. You still have time to share your projects with us till the end of the month.  

Dies, which I used at work:


Have a nice day.

Janja