Showing posts with label Horse and Carriage. Show all posts

Tuesday, May 14, 2019

Lovely Princesses

Hi, Janja is here with you.
For today, I prepared a quite simple birthday card. To create my card I used lovely princesses from Magical Fantasy release.


- CottageCutz dies: Princess Dress-Up, Little Princess & Roses, Horse & Carriage
- white card base: 5.3 x 5.3" (13,5 x 13,5 cm), folded
- patterned paper: 5 x 5" (12,7 x 12,7 cm)
- glitter paper
- colored cardstock
- colored ink pads
- glue, double-sided adhesive tape, self-adhesive foam pads

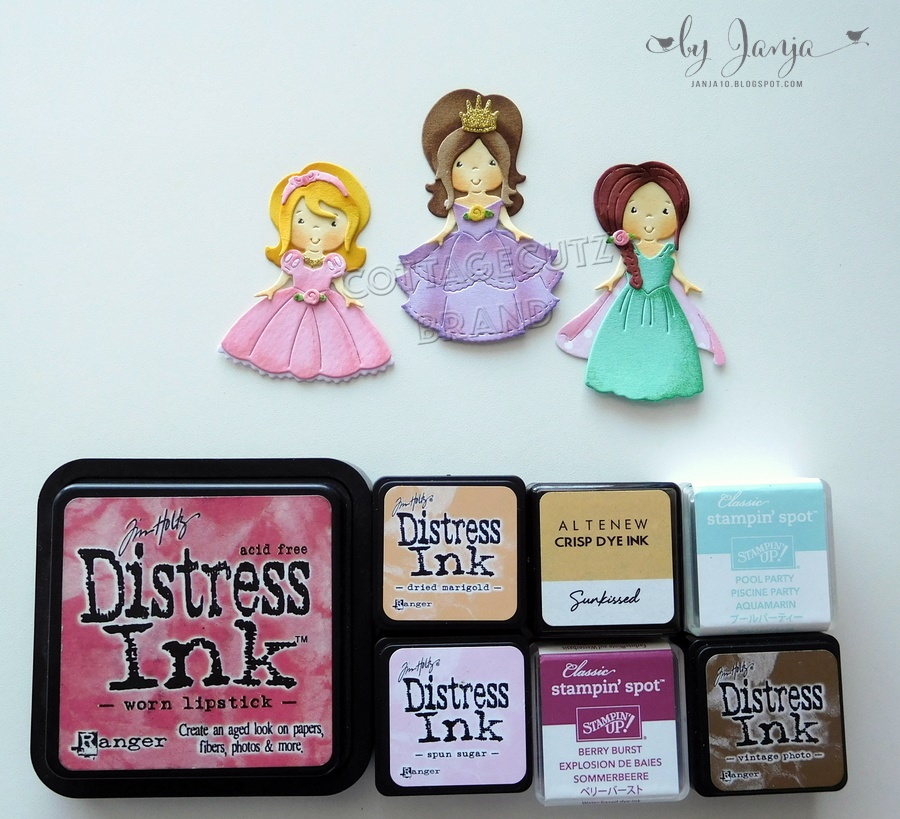
Die-cut the princesses and roses from different colors of cardstock. Die-cut the carriage from white glitter paper.
Add the shading on the edges with ink pads.


Prepare a white card base. Trim a patterned paper and golden glitter paper. Attach them to the card front.


Now attach all the cutouts to the background with self-adhesive pads and glue as shown.


I hope you like it.
Have a nice day.
Janja


Saturday, March 12, 2016

WELCOME BABY CARD

Hello friends,

It's Anita Kejriwal here and today I have a new baby card for you. I  love making cards for babies especially baby girls. There are some extremely beautiful dies in baby theme at the CottageCutz store. You will really love them .


To make this card, follow these instructions.
1. Cut the card base with white cardstock to the size 10 inches by 7 inches. 
Score on the 5inch mark on the 10 inch side. Fold. 
The card size measure 7 inches by 5 inches.

2. Cut a mat layer with another white cardstock measuring 6.75 inches by 4.75 inches.
Ink the edges with Memento Angel Pink ink colour and adhere to the card front.

3. Cut a pattern paper in baby theme measuring 6.5 inches by 4.5 inches and adhere to the card.

4. Cut out a piece in white cardstock from the CottageCutz Stitched Rectangle ( basics) die and emboss it in the baby theme embossing folder.
Apply Memento Angel Pink  ink all over. 
Adhere this onto a pink cardstock  leaving approximately 4mm around the edge. 
Attach on to the card using foam tape. Add a ribbon.

5. Cut out three pieces in white cardstock from the CottageCutz Horse and Carriage die
Stick the pieces together. This gives the look of thick chipboard. 
Apply glossy accents and sprinkle Distress Clear Rock Candy Glitter on top. 
Adhere with foam tape on the card.
I have cut out a small teddy from the CottageCutz Baby Girl Clothes die and coloured it pink. 
This I stuck this teddy inside the carriage window. 
Finish the card with stamped baby sentiment and some ribbon.

There are lot of baby theme dies that are so adorable at the store.
Please do go through them.
 I do hope you liked my card. Please do leave your comments. 
Thanks for stopping by. Have a great weekend and Happy Crafting !!


Sunday, September 09, 2012

Wedding Horse and Carriage

Hello CottageCutz lovers!!!  Today it's Carol here with a little something from the Wedding Collection.  Isn't this horse and carriage yummy.  I see so many uses for this super terrific die-it's not just for Weddings.  I know you have a sweet little girl in your life that would love this on a Birthday card.  It's a princess carriage for sure.
Just look at this Wedding border.  The images are amazing in it.  It coordinates perfectly with the beautiful Celebration Cake-I think it is just so pretty.  For my card I die cut the two dies and used some glitter glue ant white glitter  on them to make them sparkle.  The back ground is just a piece of recycled corrugated  card board distressed with some Picket Fence Crackle Paint and sprinkled with more glitter.  I used some tulle for the bow and a few pearls.  Here are the dies I used:


Hope you are having a great weekend.  Thanks for taking a look at my creation.  We'll be back again soon with more exciting creations with the CottageCutz dies!