Showing posts with label Double-Stitched Oval Set. Show all posts

Monday, October 08, 2018

Snowy Village

Hi, Lois here with a Christmas card today, made with Christmas Village 1 from the new Christmas release from CottageCutz.  There is also a Christmas Village 2, which has two additional buildings.  It's on my wish list!  Be sure to check the website for the Christmas (part3) and Halloween releases, which are currently on sale at 25% off.


To start my card I cut my cardstock and snow-patterned paper, as follows:

White - 5 1/2" x 8 1/2", scored at 4 1/4"; and 4" x 5 1/4"
Patterned paper - 3 3/4" x 5"


After folding the card base, I glued the patterned paper in the center.


I then cut an oval into the smaller white panel and cut the oval in half.  These half-ovals will form the snowdrifts on my card.


I wanted the white panel raised up a bit, so I put foam tape strategically onto the back of the panel . . .


. . . and placed the half-ovals behind the opening.


I then adhered the panel to the card base.


I cut the images from a scrap of white cardstock.


I wanted a little splash of color, so I dabbed some Copic markers onto a small scrap, cut it to the size of the church window openings and glued it behind the openings.  I then colored the church doors and the heart over the house door with red, placed small strips of Scotch tape behind the openings and inserted the small die-cut pieces.


I applied a bit of BG0000 Copic marker along the edges of the snow drifts to give some dimension . . . 


. . . and placed the buildings and the tree within the opening.


At this point, I decided that the scene needed another tree and a bit of glitter, so I added some Stickles along the roof lines and cut another tree and slipped it behind the house.  My card was now finished!


CottageCutz dies used on this card are:

http://www.scrappingcottage.com/cottagecutzchristmasvillage1elites.aspx

http://www.scrappingcottage.com/cottagecutzdouble-stitchedovalsetbasics.aspx


Monday, January 22, 2018

Narcissus

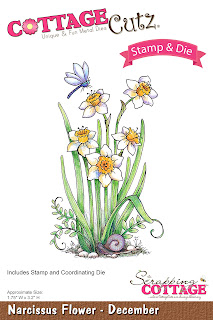
Hi, Lois here today.  While waiting for the newest release from CottageCutz to arrive, I pulled out one of the stamp/die Birthday Flowers sets, which are currently on sale on the website.  The one I used for my relatively-simple card today is the Narcissus, which is December's flower.  I found some old patterned paper which I thought would work well with this flower.


To start my card, I cut the cardstock for the base:

White - 8 1/2" x 5 1/2"
Orange - 4" x 5 1/4"
Patterned paper - 3 7/8" x 5 1/8"


I constructed my card base.


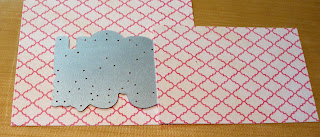
I then cut my two ovals from white and orange, using the 2nd largest Double-Stitched Oval die for the white and the largest Nested Stitched Eyelet Oval for the orange.


I stamped a small sentiment at the bottom of the white oval and glued it to the orange oval before attaching it to the card base.


Next I stamped my images onto a piece of white cardstock . . .


. . . die cut them and colored them with Copic markers.


I attached the die-cuts to my card using small foam pop dots, and I was finished.


CottageCutz sets used on this card are:

http://www.scrappingcottage.com/search.aspx?find=Narcissus

http://www.scrappingcottage.com/cottagecutznestedstitchedeyeletovalset.aspx


http://www.scrappingcottage.com/search.aspx?find=double+stitched+ovals

I invite you to check out the CottageCutz store, which has lots of discounts on their dies -- up to 70% off on some of them.

Monday, January 15, 2018

HOPE

Hi, Lois here with another card using one of the dies in the CottageCutz get-well release.  There is
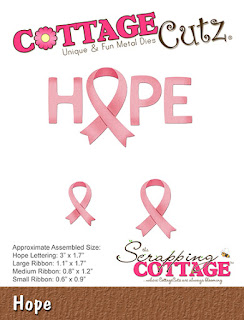
a card-making technique that is currently popping up all over the place -- the Eclipse technique.   Basically, it involves stacking layers of die-cuts for a raised, camouflaged sentiment or image.  I used this technique today on my Joy Fold Card, in which I used the CottageCutz HOPE die.


The cardstock and patterned paper for my card was cut as follows:

Pink - 4 1/4" x 8 1/2"
Brown - 4" x 8"
Patterned paper:
     1 piece - 4" x 5 1/4"
     1 piece - 2 3/4" x 4"
     2 pieces - 2 3/4" x 3 3/4"
Pieces of white and dark pink cardstock


I used a second, larger sheet of patterned paper the same as the paper I will be using on the front of my small panel.  I matched up the pattern of the smaller piece and placed my die so that the word would be centered on the smaller panel and the patterns would line up.


I then found a piece of darker pink cardstock and cut five of the large ribbons from the dark pink cardstock (as well as the small "inside of the ribbon") and the rest of the letters from white cardstock.


I then ran the letters through my Xyron sticker maker so that it would be easy to stack them.


I colored the small "inside" of the ribbon with a Copic marker (see small photo in upper left-hand corner) and stacked the letters, making sure the patterned paper was the top layer.


To construct my card, I scored the 4 1/4" x 8 1/2" pink cardstock at 5 1/2" and the 4" x 8" brown cardstock at 4".  I then added the patterned paper, as shown.


The small panel is centered on the inside panel of the card base, so that the small top panel folds over the left hand panel of the base.


I then carefully added the letters, making sure that the pattern on the letters lined up with the designer paper.


For the inside, I cut a brown and a white oval shape, using the CottageCutz Double-Stitched Oval.


I stamped an encouraging sentiment on the white oval and carefully trimmed it down by cutting on the inside stitch marks . . .


. . . glued the white oval onto the brown oval and adhered it to the inside of the card.


I added the photo clip to the bottom left-hand corner with a matching brad to hold the small panel closed, and I was finished.


CottageCutz dies used on this card are:

http://www.scrappingcottage.com/cottagecutzhope.aspx

http://www.scrappingcottage.com/cottagecutzdouble-stitchedovalsetbasics.aspx