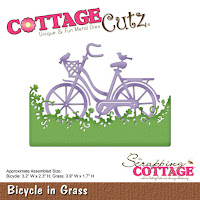
Showing posts with label CottageCutz Fancy Pocket Plus. Show all posts

Friday, June 28, 2019

Wishing You Well

Happy Friday!!!  It's Jeanne today with a card that is great for multiple occasions - birthday, retirement, new job, even get well. This wishing well die is the perfect image for all of those.
Just changing the sentiment to any one of a number of "wish" sentiments changes the card instantly.  And it is gender neutral - I love having cards on hand that I can give to my male or female friends!
I started by cutting all the pieces from white card stock.  I used a combination of Distress Oxide inks and Copic markers to color them.  I used the Copics on the small flowers as I find that easier than using a sponge dauber and ink.
I assembled the well on a silicone mat.
 Next I chose the paper for the background, frame and sentiment.  The various shades of green in this patterned paper really sets off the wishing well.  I cut it to 4 1/4 x 5 1/2 inches.  I also cut a white panel 3 1/2 x 4 1/2 inches, a dark green frame using the largest of the Stitched Wide Rectangle Frame dies and a light green sentiment panel using the tag shape from the Fancy Pocket Plus dies.
The white panel is glued behind the frame with the wishing well adhered to the panel.  I wrapped linen thread around this framed piece several times before gluing the panel to the patterned paper.
This was then put on a white card A2 base. I added the sentiment using foam dots for dimension and some small floral trinkets I had in my stash.
I hope you enjoyed my card today.  The Wishing Well die is part of the new Magical Garden release and is on sale for a limited time.  Stop by the online store and see the other great dies that are part of this beautiful release!

Dies used:
http://www.scrappingcottage.com/cottagecutzwishingwell.aspx
http://www.scrappingcottage.com/cottagecutzstitchedwiderectangleframesetbasics.aspx
http://www.scrappingcottage.com/cottagecutzfancypocketplus.aspx

Thanks for stopping by today.  I hope you have a fun and creative weekend!


Wednesday, June 22, 2016

~All About The Journey~


Hello Scrapping Cottage friends! Thanks for taking the time to stop and visit today. It's Mary Marsh here bringing you the Wednesday edition of the Blog.

Today for your viewing pleasure, I am featuring a new die set from the May "This and That" release. I have used the Bicycle in Grass die to create a graduation card. We had 3 high school graduations in our family this month plus 3 other of our friends' kids graduated.
 
This card I created for a young woman that we know through our church. I didn't want to create the typical grad card so I made something different an out of the graduation box. It makes me look at m dies in a different light when I am in that mode.
 
So let's get started with some details on exactly what I did here. Since I had already decided on the bicycle die, I looked through my patterned paper for something that would coordinate. Voila! I found this paper with bicycles on it and I liked the color scheme. So I was off and running (lol)!!!
 
Card Base: 5 1/2" x 4 1/4"
Patterned Paper: 5 3/8" x 4 1/8"
 
Next, I cut my bicycle with a maraschino red cardstock. I used the buttons from the Fancy Pocket Plus die and cut them in a honey card stock. For added interest, I used the red cardstock and laced it through the button holes.
 
Decided to place the bicycle and grass in a circle die.  I used a cloud template to sponge in my background clouds with tumbled glass distress ink. It bumps the background up a notch.
cloud template sponged with distress ink
 
sponging finished on circle die

I wanted a different sentiment on the front of the card. Not the usual graduation message. I saved that for the card inside. I found this sentiment stamp but it was too long for my size circle. So I pulled out my stamp positioner and made it a 2 liner.
 
When I use a cling mount stamp, I line it up first on grid paper and then use my clear block to pick it up. This way it's on the block straight.


 Now it's time to mask off the part of the sentiment you don't want stamped. I used painters tape. Ink it up and stamp it on the imaging sheet.  I didn't remove the painters tape at this point.
 
 
 I placed my bike and grass on the circle and then lined up the imaging sheet, with the inked side up. Once it's positioned where you want it, you remove the sheet and stamp the sentiment. Then just repeat this process for the 2nd line of stamping. I took photos of this step and then decided to do the cloud sponging. 


 Now that all the 2 line stamping and background sponging is done, I assembled my card. I added 2 hearts to the top left. These are also cut from the Fancy Pockets Plus dies.


I completed the inside of the card with the typical graduation sentiments. Cut the sentiment layer with the largest CottageCutz rectangle die. Then I cut another layer 1/4" larger in red cardstock.
 
 
Well, friends that's it for me for another week. Just a reminder that our 3rd Challenge is in full swing with a pocket theme. get info here. Until next time........inky hugs!!!
 

http://www.scrappingcottage.com/cottagecutzbicycleingrass.aspx
http://www.scrappingcottage.com/cottagecutzcirclesetbasics.aspx

http://www.scrappingcottage.com/cottagecutzstitchedcirclesetbasics.aspx
http://www.scrappingcottage.com/cottagecutzfancypocketplus.aspx


Sunday, June 19, 2016

Fancy Pocket for candy


Hi, is  Yuliya 
Welcome to my new post where I will show you how to make this Fancy Pocket for candy, using CottageCutz dies!)
Here is list of all supplies I used:
CottageCutz Dies:
- CottageCutz Fancy Pocket Plus
- CottageCutz Expressions Thanks
Other: Sizzix machine, glue, patterned paper to die cut the fancy pocket, cardstock
Let's get started!
1.  . Cut out the fancy pocket from patterned paper in three different colors.
2. Glue
3. I glue the labels
 4. 
 5. 
 6. Really Fancy Pockets!)
And don't forget, third CottageCutz challenge is waiting for you. This time theme is POCKET. You can linked your project here. And please, use only Scrapping Cottage dies.


Monday, June 13, 2016

New card "Home sweet home"

Hi my dear friends!)
Yuliya here. And today I will be sharing how to make this card  "Home sweet home"using the new CottageCutz dies of May 2016!

Here is list of all supplies I used:
Cardstock for the base card: yellow cardstock, patterned paper
CottageCutz Dies:
- CottageCutz Fancy Pocket Plus
- CottageCutz Garden Stems
CottageCutz Tea Time Doily (4x4)
Other: Sizzix machine, scissors, glue, glue marker ZIG memory system, ribbon
Let's get started!
1. Prepare cardstock for base and prepare the details for our card
2. Use distress ink - vintage Photo - to make nice edges
3.
4. Prepare some die-cuts. With CottageCutz Garden Stems cut the details out with patterned paper. With CottageCutz Tea Time Doily (4x4) cut the details out with cardstock.
5. Add some volume with the help of chipboard.
6.  Glue image
7.  With cut the CottageCutz Fancy Pocket Plus cut the details out with patterned paper.
8. 
9. 
 10.I hope you enjoy the tutorial and will be happy to inspire you!


Have fun and thank you!
And don't forget, third CottageCutz challenge is waiting for you. This time theme is POCKET. You can linked your project here. And please, use only Scrapping Cottage dies.